|
การแก้ไข Outlook Express หรือ e-mail อื่นๆ ของลูกข่าย คุณต้องการรู้ Pers ของคุณ ให้หาตัวนั้นมา
- เข้าระบบ H-Sphere control panel;
- Click Mail Service บน control panel ของคุณ.
Your provider's mail server may use different SMTP relays
for sending mail - POP before SMTP or SMTP AUTH.
In POP before SMTP, the relay system collects your IP address
when you authenticate yourself with the POP server, and then
permits SMTP relaying from that IP address for a short period
of time. In other words, if your server uses POP before SMTP,
you need to check your mail first, only then you can send
your messages. If your mail servers uses SMTP AUTH,
you must configure your Outlook Express to send a login and
password not only when you receive mail, but also when you
send it. Ask your provider which relay the server uses.
การปรับแต่งระบบ Outlook Express
การแก้ไข email ของลูกข่ายกับ POP ก่อนที่จะถึง SMTP :
- เปิด Outlook Express.
- ไปที่ menuTools และเลือก Accounts.

- จะมีหน้า Internet Accounts ปรากฎขึ้นมา, click Add
และเลือก Mail.

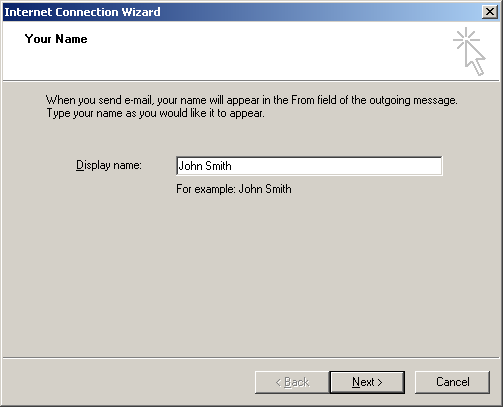
- จะมีหน้า Internet Connection Wizard ปรากฎขึ้นมา, ให้ใส่ชื่อของคุณลงไปในช่อง
และ click Next เพื่อไปยังขั้นตอนต่อไป.
Note: ชื่อนี้จะปรากฎเมื่อคุณส่ง email ออกไป.
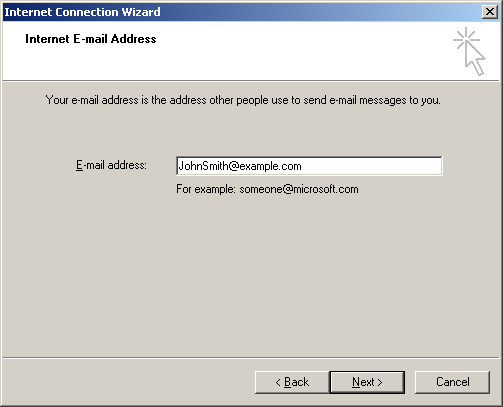
- ขั้นตอนนี้จะเป็นในส่วน Internet E-mail Address, ให้ใส่ชื่อEmail
Address ของคุณ และ click Next เพื่อไปยังขั้นตอนต่อไป.
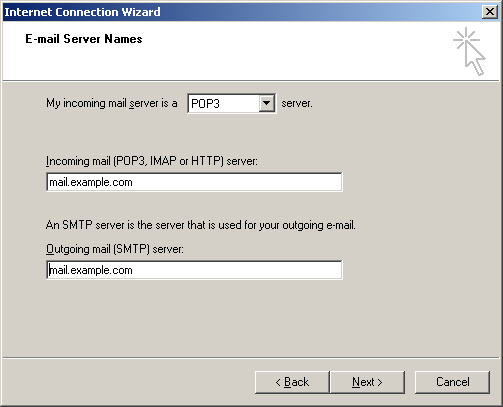
- ขั้นตอนนี้จะเป็นในส่วน E-mail Server Names:
- Incoming mail server is a: ให้เลือกเป็น POP3.
- Incoming Mail Server: ชื่อโดเมนของคุณ.
- Outgoing Mail Server: ชื่อโดเมนของคุณ.
- click Next เพื่อไปยังขั้นตอนต่อไป.
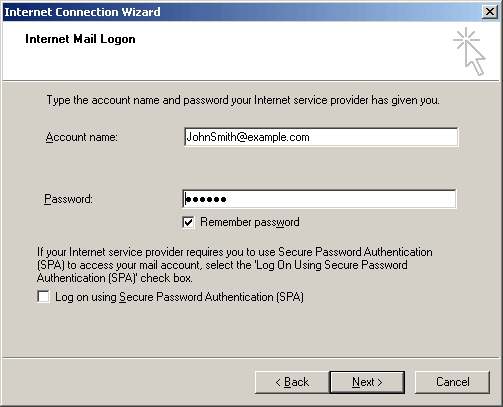
- ขั้นตอนนี้จะเป็นส่วนการป้อนรหัสผ่านในการใช้.
- Account name: เป็นชื่อที่ใช้ในการส่ง mail ของคุณ ให้ใส่ชื่อเต็มๆ.
- Password: เป็นรหัสผ่านเข้าใช้งานตามที่กำหนดไว้.
- Remember Password: ใช้สำหรับให้เครื่องจำ Password ของคุณไว้โดยไม่จำเป็นต้องใส่ใหม่อีก.
- click Next เพื่อไปยังขั้นตอนต่อไป.
- เมื่อเสร็จสิ้นขั้นตอนการลงทะเบียนกับ Outlook Express แล้วให้
Click Finish.
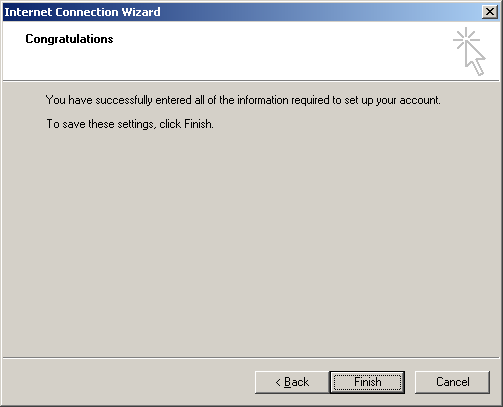
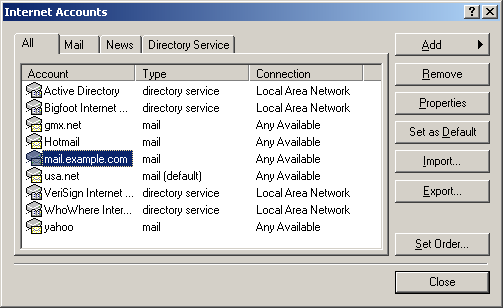
- ตอนนี้ email account ได้ถูกสร้างขึ้นมาแล้ว ให้เลือก Accounts
จากเครื่องมือ drop down list ในเมนูบาร์.
- จะมีหน้าInternet Accounts ปรากฎขึ้นมา, เลือก
mail account ที่สร้างเสร็จเรียบร้อย และ Click Properties
เพื่อทำการเซ็ตค่า email account ของคุณ.
- จะมีหน้าProperties ปรากฎขึ้นมา, ให้เลือกแท๊ป
General และให้กรอกข้อมูล email account ของคุณ.
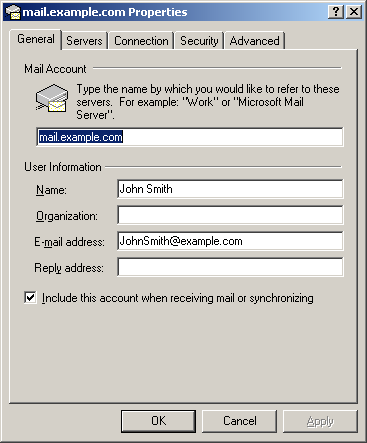
คุณสามารถที่จะ:
- ตั้งชื่อ เพื่อที่จะได้โชว์ในเอกสาร email ของคุณ
- ตั้ง email ตอบรับ (โดยควรตั้งชื่อเดียวกับ email ที่ใช้อยู่)
- Click Apply และกดOK เพื่อบันทึกการตั้งค่า.
|